|
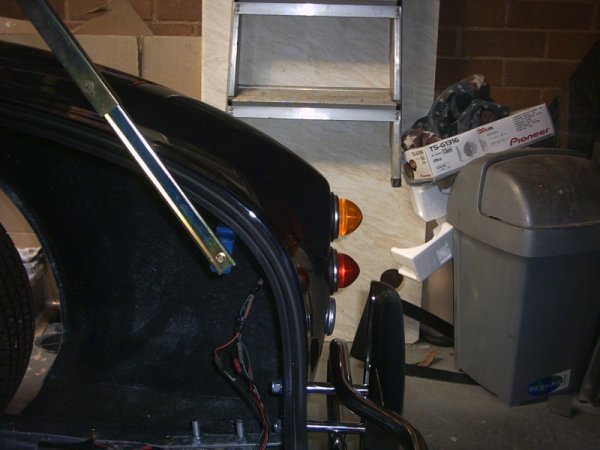
11/01/04 Well had a fantastic time in Lapland, the day we saw Santa it was -30 degrees, brrrrrr bit cold. Anyway back to the build, although I had wired up the dashboard , I had still to connect up all the warning lights, ie 2 Indicators, Main Beam, Handbrake warning light, Oil, Ignition and the two illuminated switches for Fog and Reversing light. No problems , it just goes to show how good the Pilgrim wiring diagram is, once connected all lights and switches worked fine. The Fog and reversing lights now needed to be fitted, but in order to comply with SVA I had to find a way of mounting the lights on the nudge bar, after SVA the lights would be flush mounted to the rear of the body, between the top and bottom nudge bar. The simplest method I found was to make up a couple of aluminum brackets to act as clamps holding the lights onto the front of the top/bottom nudge bar. Doesn't look too bad.
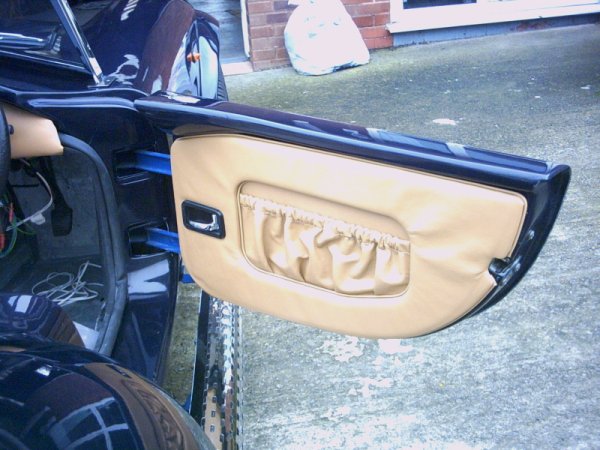
Next job, fitting the door panels and rubber sealing strip. No real problems here, I used the large size rubber seal to ensure a good fit between the closed door and the seal. Simply push the seal into place , leaving enough to be 'tucked' under the dashboard, the other end will be hidden by a chrome 'end cap'. I fitted the panels with Industrial strength Velcro, to avoid any screw heads showing.
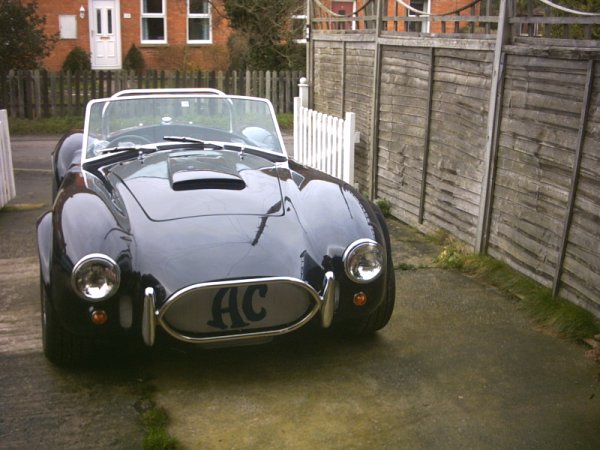
Now time to fit the Mesh grill set,once again no problems, the mesh is ready to fit, I just pushed the small ones into place and stuck with silicone. The larger main grill , I held in place with cable ties, to pull it into place then used self tappers through the nose lip to secure the grill.
I was now getting fed up with a length of wood to propping open the boot , so time to fit the boot stay. This is the same as the bonnet stay but needed a bracket made up to form an extension to the nudge bar fixing bracket. I made up a suitable length 1" flat to fix the stay to. The other end of the stay simply screws to the boot.
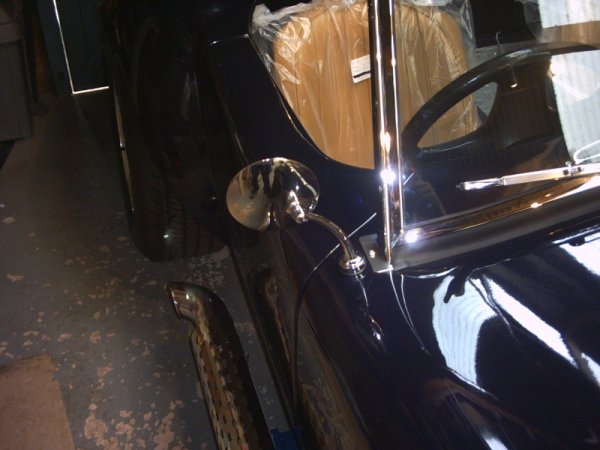
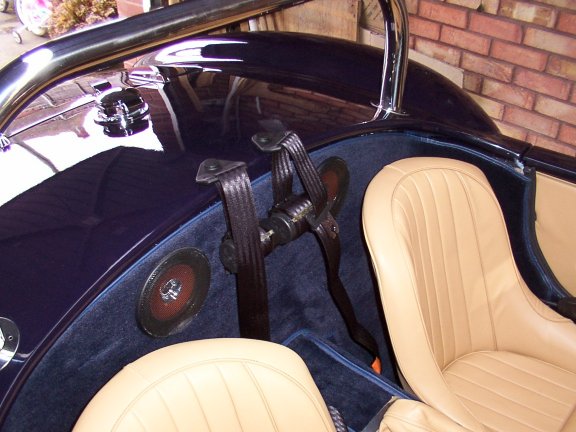
Next job was to cut 2 large holes in the rear bulkhead for the speakers and at the same time fit the 7/16" UNC bolts for the seatbelts, the wires for the speakers run under the carpet. Right now for the seats, hmm.. first of all you have to fit the seat runners, but where do you fit them?. I noticed the floor has two sets of holes, (why two ?), drilled in both the passenger and drivers side floor, these holes match up with the fixing holes in the seat runners. So I placed the seats in the correct place, then marked both sets of holes on the underside of the seats. After removing the seats I offered up the runners and decided the inner set of holes gave the best fixing points. The runners were then screwed to the base of the seat ensuring the runners were parallel and central to the seat, with the seats back in the holes lined up perfectly, and 8mm bolts seemed just right for bolting the seats down. The floor is not very flat,so washers are needed to keep the seat sitting flat without distorting the runners. The seats slide back and forth no problem with plenty of leg room. One final job, the wing mirrors. I bought the Pilgrim mirrors as these seem to have a longer 'stalk' than most giving a better view, they were easy enough to fit and seem to give a pretty good rear view area.
That's about it for this week, only really the carpets now and a bit of tidying up to do, so better get the SVA paperwork sorted. The DVLA Inspector is comming round on Tues, and I have been issued with a chassis number. The inspector came and verified my chassis number, as well as the donor parts used. Two days later a letter arrived from the DVLA informing me the Inspector was happy with my kit and that I would be allocated an age related plate, 'C' suffix. Great now just waiting for the SVA date to come through. Spent most of Saturday making up the inner seat belt mounts before fitting the carpet. All I did was to make up two 2" metal plates, and welded a 7/16" UNF nut to the back in the middle, then bolted this plated to the inside of the tunnel with 4 8mm bolts. The SVA inspector was happy with this setup last time so should be okay. The inner mount point I have placed in line with the outer fixing point. Right now to fit the carpet, there are no instructions and at first looks very confusing, but once spread out on the garage floor the various pieces, (which include the boot), start to make sense. I trial fitted the pieces first to establish which had to overlap which. Now comes the messy bit, I am using extra strength spray adhesive, first starting with the inner sill to front outside foot well, stuck inside the foot well and spraying the adhesive soon has you high as a kite !. I started at the front, then the centre tunnel up to the dash, then the back and rear tunnel. This just left the floor last , everything fitted fine and I used 3 tins of spray.
Started on a few more of the 'little' jobs this weekend, first the seatbelts, no problem here, just follow the fitting instructions
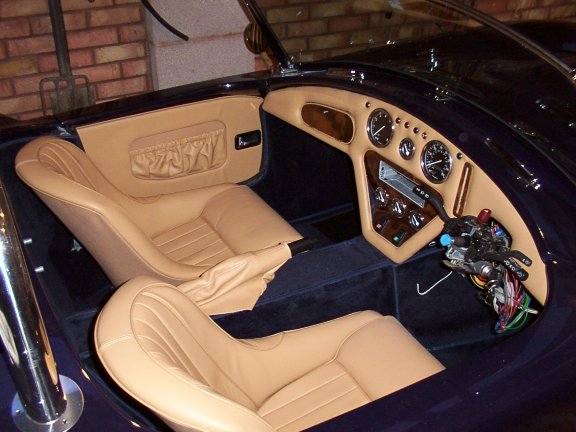
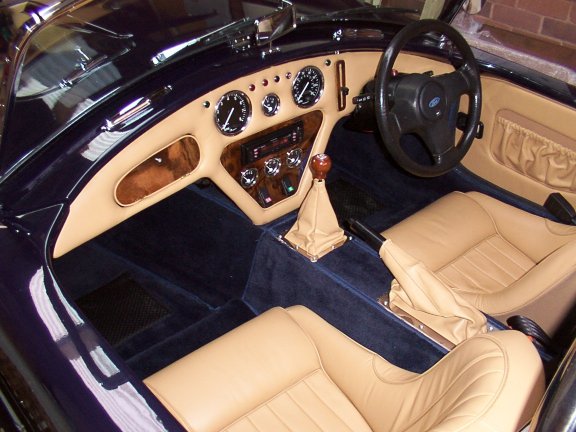
Next I removed the dash to finalise the wiring for the Radio and glass in the glove compartment box, also while I was there fit the two hoses from the heater to the screen vents. When re-fitting the dash it soon became obvious there is very little room for the heater hose once the glove compartment box is fitted, they are both fighting for the same area. With a little bit of persuasion the dash was back in place. Now I could fit the Radio , no problems here and everything worked first time. Next I fitted the Handbrake and gear lever gaiters.
Interior looking good now, just need to make up some side panels to fit under the dash to hide the wires and heater hose. I made up a bracket next to hold the speedo pickup in the correct place to read the daisy wheel, it mounts the sensor on directly on the diff. I rang ETB who simply asked me for my Wheel Size, Diff Ratio and number of petals on the daisy wheel, they then calculated the number of 'pulses' I needed to set the Speedo to , nice chaps. By the way my wheel size is 235/60/15, Diff ratio = 3:36:1, (Granada), and number of petals = 30. Therefore the number of pulses works out to be 77880. Apparently the Pilgrim setup is very sensitive to the sensor clearance and should be set to 2mm. I have heard of people having trouble with the Speedo setup. Luckily for me I also have the Rover potentiometer fitted to the gearbox and the ETB Speedo can be calibrated to use the Rover sensor so If I have any problems I will switch over and re-calibrate. The only problem I had today was the reversing switch snapped in half as I was tightening it up, bummer, still Rimmerbros will have one. Still not heard when my SVA date is yet :-)
|


![]()