|
Stripping the Donor !!
November 15th
All the loom is now in the middle of the car, next
thing is to pull the whole lot up through the fuse box hole. Finally
got all the loom out and into a cardboard box, I did notice a couple
of my labels have fallen of,,oh dear...
Now I went round the car, picking up any nuts, bolts
and cable clips I could find, removed the seat belts in case I could
sell them and pulled all the rubber trim off the doors. The Sierra
was looking very bare now, time to call the scrappy and get the
shell towed away.
After phoning around all the scrap dealers, only one
would agree to collect the car. The cost was £40 and they
could come whenever I wanted. Right time to get the Sierra shell
out to the bottom of the drive ready for pickup.
I thought I would have a go at moving the shell on
my own, (stupid when you think about it !), anyway I took the engine
hoist around to the back of the car and lifted it off the axel stands.
Then around to the front and put the trolly jack under the front
of the car, (using a 4"x4" beam across the underside of
the body).
Jacked up the front and pushed... hey presto the shell
moved, the engine hoist was quite happy to be 'pushed' along with
the shell. All was going well until I cam to the slight slope in
my drive, the whole lot started to run away from me!, luckily the
trolly jack slipped from under the front, dropping the front down
and acting as a brake. The shell ended up stopping in just the right
place.
November 17th
Mr scrappy arrived on time but could not maneuver
around enough to get the back of the lorry facing up my drive. We
then came up with the idea of hooking one of the chains from the
lifting arms around the back of the shell and dragging it out onto
the road. All went well until the shell slid to one side and hooked
itself around my fence !. Mr scrappy heard me shouting just in time
to stop my fence and gate ending up in the road.
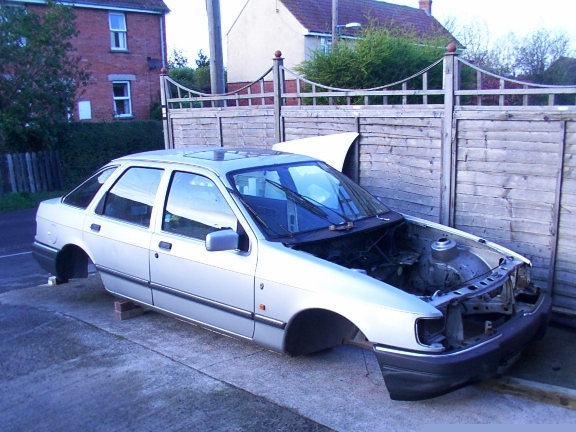
Once the shell was in the middle of the road, (much
to the annoyance of the traffic), it was no problem loading onto
the lorry. I took my eye off the operation just long enough to miss
the shell tilting just enough to empty the contents of the washer
bottle down my back.
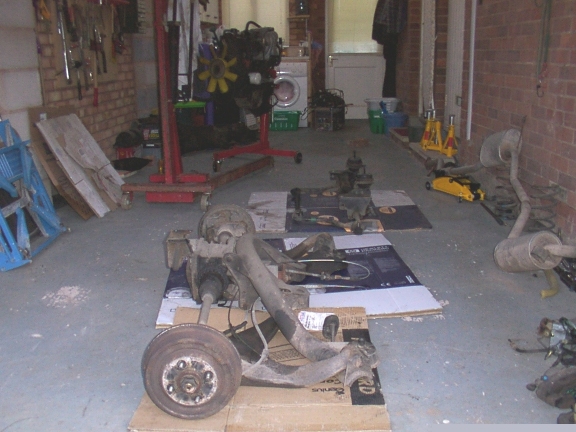
Right next job is to clean up the donor parts now
I have my garage space back. I decided to start on the rear subframe
assembly first so I used paint thinners to clean the oil and gunk
off , removed both half shafts and cleaned up the diff. The parts
actually cleaned up well, I also decided to replace the half shaft
rubber boots and diff oil seals.The rubber boots can be replaced
without removing the 'metal' can and cv joint. I used 'stretchy'
rubber boots from partco which just stretch over the can with the
aid of special lubricant and a plastic cone. (like the ones they
use in hospital to stretch your anus after a piles operation, or
so I have been told).
Well it's the end of the day now, I'm off to the Exeter
Kit Car Show tomorrow, so painting will have to wait until next
week.
24/11/01
Great day last week at the Kit Car Show, the Robin
Hood Stand was quite good with the demonstrator on show, and the
kit laid out beside the demonstrator. Seeing the kit made me realise
how big the chassis is, and how many bits there are in the kit!.
Got down to painting all the bits today. I have not
used Hamerite as in my opinion it chips to easily, so instead I
have opted for Tractoll synthetic enamel from Hinckley Valtones.
I covers very well and dries to a very glossy finish just like Hamerite
but is slightly softer and more flexible. However it does need a
primer, but the primer only take 30 mins or so to dry.
I have been painting the parts on the garage floor,
funny how the dog never wants to pay you any attention until you
have a lot of wet bits all over the floor. He very carefully steps
over the wet painted parts, but forgot about his big bushy tail
dragging behind all over my bits !!. He is now a Border Collie with
more black than he used to have.
25/11/01
Still painting the bits.. I have removed all ancillary
components from the engine and painted those red, i.e. water pump,
thermostat housing, cam cover. The rocker box is blue, the block/head
painted with high temp black enamel. Painted the gearbox black,
the diff black half shafts red and the rear brake drums red. The
front calipers are also red and the bottom strut black.
Off to Partco now to pick up gaskets set, clutch kit,
and cam belt. Next weekend is the last weekend before I pick the
kit up so I hope to reassemble the rear suspension, clean the garage
up a bit and make room for the kit. Before I assemble the rear end
I intend to replace the oils seals in the diff and the 4 rubber
boots at each end of the drive shafts. To save stripping down the
CV joint I have purchased some special 'stretchy' rubbers which
with the aid of a cone and some grease can be slid over the 'can'
.
01/12/01
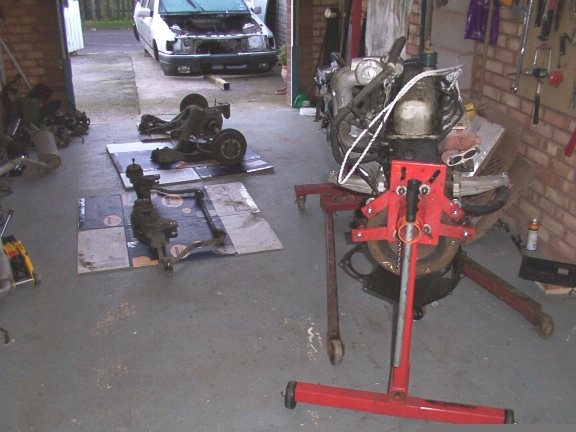
Everything painted up and ready for delivery of the
kit next Saturday. In the picture below the engine has had the old
manifold re-fitted just to keep any crap out until the RHE 4 into
1 is fitted. The EFI Plenum chamber has yet to be fitted as I am
in the process of 'lowering' the plenum chamber as per D Wilsons
instructions. The engine also still has the original sump, I have
modified a spare as per the instructions on the ROHCAR web page,
build tips.
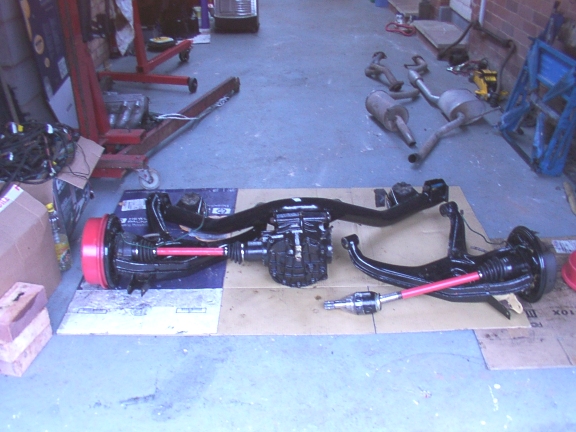
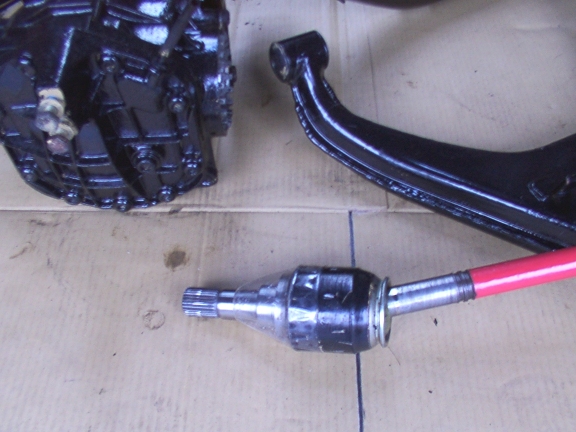
The picture below shows the rear sub-frame assembly just before
the second trailing arm is re-assembled into the diff. Notice the
modified Robinson's squash bottle used as a 'cone' to slide the
new rubber boot over for the drive shaft end. You can get a proper
cone for the job but it costs £10 plus VAT, so being a bit of a
skinflint I used a 95p squash bottle.
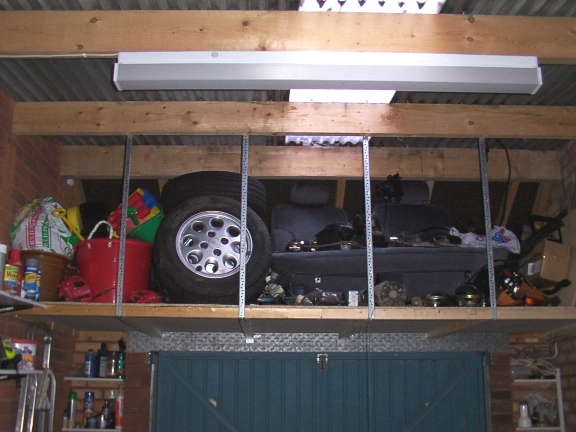
In an effort to make as much room as possible for the kit, I have
built a platform above the up-and-over door of my garage, it's quit
full already!.
This is the last update for the donor area,
the story now continues in the Collection Day area. Then on to the
build diary for December.
|